Showing posts with label Healthy Lifestyle. Show all posts

Thursday, July 14, 2016

Chocolate Mint Protein Nice Cream

When I came across "Nice" Cream, not ice cream, I was very intrigued. Then, to discover how simple it was to "whip" up was just as better. To top that off - IT'S TRULY HEALTHY!!! The coloring for this chocolate mint comes from the spinach. You don't even taste the spinach. What a fabulous way to serve spinach to your loved ones without them even realizing they are getting their veggies and "nice-cream" in one serving. So....SNEAKY! LOL!

Ingredients:
  • 4 frozen bananas
  • 1/4 cup fresh mint leaves (or mint extract)
  • 1 1/2 cups of baby spinach leaves
  • 1/4 - 1/2 cup of almond milk (or your choice of milk)
  • 2 scoops of protein powder (I love Plant Head)
  • 1/3 cup chocolate chips (optional)


Instructions:
Break up the frozen bananas and then place them in the food processor (or blender). Add the rest of the ingredients, except the chocolate chips. 

Mix until smooth. You can eat as is, if you like the soft-serve consistency or freeze for about an hour and then scoop, if you prefer your "nice" cream to be scoopable. 


Note: I found it best to place the nice cream in individual serving dishes, then freeze.


Enjoy!

Original recipe can be found at

Sunday, July 10, 2016

100% Whole Wheat Zucchini Patties


I happened to have purchased more than my share of zucchini one afternoon.  They were on sale too! I have very little willpower in those moments.  Well, one of the recipes that I made was zucchini patties.  I've made them before, but decided to make a few changes to the recipe. The result was so much better and equally just as delicious. Enjoy!

Ingredients
  • 3 small zucchini, grated 
  • 1 teaspoon salt 
  • ¼ cup yellow onion, chopped (optional) 
  • 1 cup whole-wheat Panko bread crumbs (or you can use whole wheat flour) 
  • ½  cup grated Parmesan 
  • 2 cloves garlic, minced 
  • 1 large egg, beaten 
  • Kosher salt and freshly ground black pepper, to taste 
  • 2 tablespoons olive oil


Instructions
Place grated zucchini in a colander over the sink. Add salt and gently toss to combine; let sit for 10 minutes. Using a clean dish towel or cheese cloth, drain zucchini completely or squeeze out the extra liquid.  
OPTIONAL: In a skillet, heat some olive oil, then add onion. Cook until translucent. About a couple of minutes. 


In a large bowl, combine zucchini, Panko, Parmesan, cooked onion, garlic and egg; season with salt and pepper, to taste. Heat olive oil in a large skillet over medium high heat. Scoop tablespoons of batter for each patty, flattening with a spatula, and cook until the underside is nicely golden brown, about 2 minutes. Flip and cook on the other side, about 1-2 minutes longer. 


Serve. Makes about 5-6 patties depending on size.

Saturday, April 9, 2016

Spiralized Sweet Potato and Carrots w/ Honey-Ginger Sauce

I find it so very amusing when I'm engaged in conversations with people about how hard it is to find things to eat that's healthy. Or, the other favorite one, it's so expensive to eat healthy. I'm like...really? Tell me what's in your frig. Don't say........LETTUCE!!! There are so many healthy meals that can be created. Now, let's keep in mind, I'm not a gourmet chef. I just love to cook and eat. I love great tasting foods. I also love to create. Now, let's group my love for foods, living a healthy lifestyle and a love for creating and that results in food and fun. 

Let's think outside the salad box and get creative!

Arriving home one day, I was left thinking about what I was going to enjoy for dinner. I had a sweet potato (or yam) on my table. Wasn't really feeling like I wanted to have it baked, yet I did want to eat the potato. But, how? I thought...spiralize it with my little Benriner vertical spiralizer (Like the plug? I figured you'll ask me what in the world am I talking about...lol). I needed something to accompany my potato. So, I grabbed a carrot from the frig and spiralized it too. 
For an extra boast of flavor, I combined some fresh ginger (I grated it) and some honey and coated the spiralized combo. Familiarize yourself with the technique of spiralizing. Check out this video, using the same spiralizer that I have.

Yum! Enjoy!

Ingredients:
  • 1 - medium size sweet potato, clean and peeled
  • 1 - large carrot, clean and peeled
  • 2-3T of honey
  • 1t - minced ginger
  • pinch of sea salt
  • black pepper
  • 1-2T olive oil
  • parchment paper
  • baking sheet

Time to Create:
Photo credit: Angelfit Trainer Meals
Preheat oven to 400°F.   After cleaning, peeling and spiralizing the carrot and sweet potato, place them in a bowl and combine them together.  Drizzle some olive oil over the combined veggies. With your hands, rub the olive oil over the veggies making sure to coat. Sprinkle a little bit of sea salt and black pepper over the oil coated veggies. 

Spread some parchment paper over the cooking sheets. Lay the veggies onto the parchment-lined baking sheets. Since, I was using a large sweet potato, I ended up utilizing two baking sheets. You may need only one. You want to be able to spread the veggies out pretty thin for even baking. 

Bake in the oven for 15 to 20 minutes. Meanwhile, mince some fresh ginger (technique here). I used 1tsp, remember it's your taste preference. You can always do a little more and add small amounts of ginger to the honey until you reach your desired taste. Combine the ginger and honey, then set aside. 
Photo credit: Angelfit Trainer Meals

Check veggies for desired doneness. Once done, remove from oven and place the spiralized veggies into a heat resistant dish. Drizzle the ginger/honey dressing over the warm veggies. Being sure to coat. A little bit goes a long way here with the dressing. You'll be surprised how it coats.

Top with a spring of flat-leaf parsley and serve. 


Thursday, February 18, 2016

Black-Eyed Pea Hummus with Olive Oil

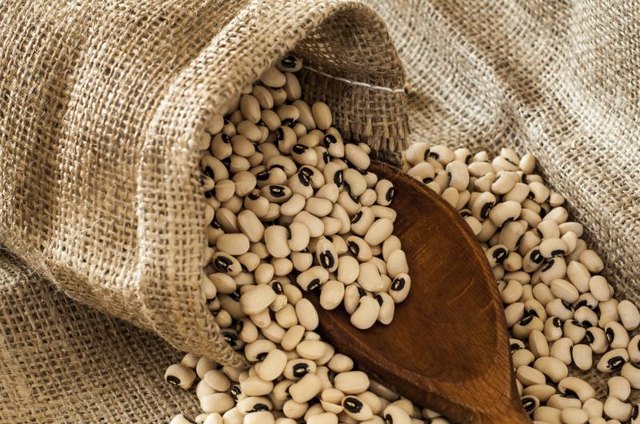
Health Benefits of Black-Eyed PeasYes, that's what the title says...Black-Eyed Pea Hummus with Olive Oil. That's right, no greens...no ham-hocks....no salted pork. This is that moment when you think beyond what you're accustomed to and bring a new taste to your tongue. I have so many favorite recipes and I can tell you, I'm not one who will get bored when it comes to eating healthy. New cooking techniques are like new adventures - leaving you feeling satisfied and rewarding at the same time. 
Let's talk a bit about our black-eyed peas. Did you know that black-eyed peas are actually a bean? Guess the peas sound better then "Black-eyed Beans" (Hmmmm...lol). According to www.livestrong.com, one of the main health benefits of black-eyed peas is their high fiber content. A half cup of dry black-eyed peas that are cooked have 5.6g of fiber, while a half cup of canned black-eyed peas contains 4g of fiber.  They are also high in potassium, are a good alternative source of protein, low-fat, low-calorie, and a good source of iron. For more benefits, click here
The below recipe is pretty quick and very easy to put together. By all means, try this, make the recipe and just tell your friends or family it's hummus. Once you see how they keep eating and wanting more, then tell them it's "Black-eyed Pea Hummus"...YES!!! Be sure to have your camera ready to snap and post their facial expressions. I love seeing the surprise expressions on faces.

Enjoy!!!
Photo courtesy: Angela Ledyard


Black-Eyed Pea Hummus with Olive Oil Makes about 3 cups hummus

Ingredients:

  • 2 -15oz. cans - Black eyed peas, rinsed and drained (I prefer Eden Organic Brand)
  • 2 tsp.minced garlic
  • 4T to 6T - fresh-squeezed lemon juice (start with 4 then add to your desired taste)
  • 1/2 to 1 tsp. salt
  • 4T. olive oil (save 2T to use for drizzling on hummus later)
  • 1/2 tsp. ground cumin
  • 3T to 6T -  tahini (start with 3T then add more to your taste)
  • 2T water (for thinning hummus as needed)
  • Sprinkle of paprika for taste
Time to create:
Place a colander in the sink and drain the cans of black-eyed peas. Rinse them with cold water until there isn't any more foam. Let the peas sit for a couple minutes.
Place the peas, garlic, lemon juice, salt and olive oil into a food processor or blender. Puree the ingredient for 1 to 2 minutes. 
Add in the ground cumin and 3T of tahini. Puree until all combined.
Now, taste to see if you want to add more lemon juice and/or tahini. Keep adding small amounts until you reach your desired taste.

If the hummus seems too thick, add a some of the water and combine. 
Place the hummus onto a serving bowl, drizzle with olive oil, and sprinkle with paprika. Enjoy!!!

*Hummus can be stored for at least a week.

Monday, October 19, 2015

Ratatouille-Style Vegetable Stew

Having a healthy lifestyle calls for creativity in the kitchen. As well as thinking outside the box on eating.  Last week's trip to the West Side Market, I bought a beautiful bag of fresh basil, and nice size eggplant. According to WHfoods.org, eggplant is a very good source of dietary fiber, vitamin B1, and copper. It is a good source of manganese, vitamin B6, niacin, potassium, folate, and vitamin K. Eggplant also contains phytonutrients such as nasunin and chlorogenic acid. 

With the veggies that I already had at home, this was a fun recipe to whip up over the weekend.  It was light and very filling.  As an extra idea, you can add some wheat pasta shells on the side and some grilled or baked lean meat. Enjoy!


INGREDIENTS: 
  • 2 tbsp olive oil, divided
  • 1 cup medium-diced red onion
  • 4 cloves garlic, minced
  • 1½ cups medium-diced red bell pepper
  • 2 cups medium-diced eggplant
  • 1 cup chopped tomatoes 
  • 1 cup medium-diced zucchini
  • ¼ cup vegetables stock, homemade or boxed low-sodium
  • ¼ cup fresh basil, chopped
  • ¼ cup fresh chives, minced
  • 2 tbsp balsamic vinegar
  • Ground black pepper, to taste 
INSTRUCTIONS: 

  • In a Dutch oven or large skillet on medium, heat 1 tbsp oil. 
  • Add onions and sauté until translucent, about 3 minutes. 
  • Add garlic and cook until fragrant, 30 seconds. 
  • Add bell peppers and sauté for 2 minutes. 
  • Add eggplant and cook until tender, about 5 minutes. 
  • Add tomatoes and cook for 3 minutes. 
  • Add zucchini and cook for about 1 minute. 
  • Add stock and simmer until liquid has thickened and vegetables are tender, about 10 minutes. 
  • Stir in basil and chives.
  • Stir in vinegar, remaining 1 tbsp oil and black pepper. 
  • Ladle into bowls. 

SERVES 4

Original recipe from Clean Eating Magazine.

Friday, July 24, 2015

Bench Donkey Kicks

Adding to the butt toning (or building) regimen, here is another one of my favorites, donkey kicks. These require really no equipment. You can do these on a bench, as shown, or the floor. I would strongly recommend that you place a mat or fold up a towel for your knees.  


Take your right knee and bring it toward your right elbow, while engaging your core, then swing the right knee out and up, and engage your glute muscles on the lift. Do a set of 20-25 reps, then repeat on the left leg. Opt for 2 sets on each leg.

The donkey kick works your lower back, core, legs and glutes. With every lift you are toning all your glute muscles.  This movement is great as an alternative to doing squats.   


No excuses - go ahead and have at it!

Sunday, March 29, 2015

Lying Leg Curls

The focus of this exercise is the hamstrings and glutes. The back of the thighs that tend to be forgotten in regular workouts. Grab a moderately heavy dumbbell and a fitness mat and get ready to hit the floor. 

First, get down on your hands and knees and place a dumbbell between your feet. Being sure to have one end of the dumbbell supported by the top of the soles. Hold the dumbbell securely and then lie onto your stomach.  Place your hands under your chin and rest your head on top of them.  

Now, keeping your thighs on the mat, begin to curl your knees up while keeping the dumbbell locked in between your feet. 

Continue with this movement, raising and lowering the weight for 15-20 reps. 

This is one simple, yet very effective move to build those muscles in the back of the legs. Enjoy!!!

Sunday, March 22, 2015

When I Started My Yoga Practice

It was in mid-March of 2013, that I would think seriously about making yoga part of my lifestyle. For years, I felt that yoga was “too soft” and “tranquil” for me. I stretched, worked on my flexibility and even had countless conversations with people who swore by yoga. I just wasn't completely captured as it being something that would stimulate my current workout routines. It just wasn't my "yoga" moment.  However, it had always been in the back of my mind.  Especially, when I knew of all the benefits that yoga possessed. 

On March 21, 2013, my time had come. I decided that yoga would become part of my regular lifestyle. Not sure if it was due to my renewed spirit after the thyroid cancer experience or the fact that this time out, I vowed to be a much better resource to my trainees and my network with fellow instructors. Heck, the common goal for us is having a healthier lifestyle and a better quality of life.

I dove deep into my yoga practice and welcomed it into my life like a new found love. Looking back, I’m appreciative that I began my practice at this time of my life.  I don’t think I would have truly practiced it before or made the time. I was all weights and strength building with moments of teaching Zumba. Things happen when they are supposed to...right? 

We have the power over our bodies.  We can either take care of ourselves or not.  We can fuel ourselves with the right nutrients or not. We can stress out over everything or develop a method to controlling that stress.  Yoga brings it all together getting you to start from within – your mind, your spirit, your body. I appreciate that. NAMASTE!


Monday, March 16, 2015

Know the Affects of Wearing Heels

Let's talk about wearing heels. Being healthy is not just eating better, controlling stress and exercising. It also includes things like the shoes we put on our feet - HIGH HEELS! I have nothing against heels. Believe me, I have a nice collection of them. It's important to know how these beautiful and sexy shoes affect our bodies.  

Looking at Osteopathic.com, statistics show that high heels are one of the biggest factors leading to foot problems in women, with up to a third suffering permanent problems as a result of prolonged wear. These favorite sexy shoes, can cause a range of ailments, from ingrown toenails to irreversible damage to leg tendons. High heels have also been linked to overworked or injured leg muscles, osteoarthritis of the knee, plantar fasciitis and low back pain. 

The increased weight on your toes causes your body to tilt forward, and to compensate, you lean backwards and overarch your back, creating a posture that can strain your knees, hips, and lower back. I'm willing to guess that most women that wear heels and experience the above symptoms, relate them to the shoes.  The Huffington Post provides a really nice graphic illustrating the effects that these beautiful, sexy shoes have on our legs and feet. 

I'm not in favor of eliminating heels, but like everything else, being knowledgeable about the effects, you are able to make some solid adjustments to minimize future problems. 

Here are a few tips:

  • Wear heels on days that require limited walking or standing.
  • Alternate your shoe choice throughout the day or from one day to the next. Don't wear your high heels all day; and wear more comfortable shoes, such as athletic or walking shoes for commuting to and from work. Wearing shoes that allow your body to move naturally during walking will allow your feet, legs, hips and back to stretch.
  • Stretch. Take time every day to stretch your calf muscles and feet. Osteopathic.com recommends putting a pencil on the floor and try picking it up with your toes.
When wearing heels, keep in mind the above tips and listen to your body.  Remember, it's not worth sacrificing your legs or feet for a moment of sexiness.  

Tuesday, February 24, 2015

Simple Quinoa Tabouli

The thing about eating healthy is to explore foods that you wouldn't ordinarily eat. People get so fixated on eating the same items over and over with the belief that it’s safer this way. NO! Why put yourself or your tongue on such boring restrictions. You don’t have to be a gourmet chef to create delicious and healthy meals. Besides, once you put forth the effort to create some healthy recipes, before you know it, you’ll be whipping up your own dishes and saving money too!

Quinoa Tabouli

1 cup dry quinoa (cooked according to package instructions)

After quinoa is cooked and fluffed, in a large bowl move it into a large bowl. Add cucumber, tomatoes, onions and herbs and toss to coat.

1 1/2 cups chopped cucumbers (I used one large cucumber)
1 ½  cups chopped tomatoes (or use cherry tomatoes - halved)
1/2 cup chopped onion (can substitute green onions)
1 cup fresh mint leaves, finely chopped
1 ½ cups fresh Italian parsley, finely chopped

Dressing: In a small bowl, whisk garlic and lemon juice. Drizzle in the olive oil. Add the cumin. Season to taste with Kosher salt and pepper.

1/3  scant cup freshly squeezed lemon juice (about 2 lemons)
1 garlic clove, grated
¼ cup extra-virgin olive oil
½  teaspoon ground cumin
½  teaspoon Kosher salt
¼  teaspoon pepper

Drizzle dressing into quinoa mixture. 

Thursday, February 5, 2015

I've Returned...YAY!

I’m back. Since, my last entry, I got caught in the social media tornado! So, it’s not that I’ve fallen off the face of the earth, very far from that. It appeared that I had landed up in the “social media oz” that took me on the path to the “Land of Instagram”, playing with the flying “Tweets” and ended at “The Facebook City”…LOL!

I can say, it’s been a very interesting journey. It appears that I had to “re-route” a huge area of my life.  I had to let go of a major relationship.  Often times, we fight that feeling in our gut that tells us to let go.  Maybe, we think we will be seen as failures because it didn't work out. NOT! If things are always negative and where both people are not nourishing the relationship, it will have no life and die! I see myself as a success in making the decision to let it go. Lesson learned! New routes bring interesting paths and undiscovered territories. LOL!

I’m still learning more and more about my body after my thyroid cancer. I will continue to share as I hope that my story will help others to not give up on their goals. I have so much to share and look forward to the adventures of 2015.

Friday, May 2, 2014

Spinning - As in Indoor Cycling

Often times, I enjoy being a participant in a fitness class as much as I do being a fitness trainer. It gives me a chance to truly absorb the class and provide genuine feedback to my clients and trainees. It’s one thing to know about different classes and training techniques, but it’s something all together different when you can express these sessions from the view point of a trainee.


Spinning class. I was encouraged to attend one of my fellow yogi’s spinning class.  I had never taken a spinning class before and found myself to be a bit intrigued to attend this one.  It was at a nice spot in the Hingetown area of Cleveland, called Harness Cycle.  Of course, I had to visit their site to see just what the studio was about and I liked what I saw. I created an account and she and picked a Friday evening. The club’s “Happy Hour” cycling class offering $5 for the session. Nice, right?


            I packed my padded cycling shorts because I had imagined that there would be some soreness in my “saddle” area.  They provided towels and water.  The instructor assisted me with setting up my bike and then it was time for the class to begin.  I have to say, I love seeing other instructors display passion and energy in their classes. This instructor was definitely showing hers. Her music playlist was on point and had nice variety. The class was 98% packed and there were people of all shapes, sizes, ethnicities and gender.  A perfect mix. 


            Ordinarily, I am a pretty coordinated individual.  At a few times, I found it difficult to pedal a mile/minute and “tap” at the called out increments. Tapping is when you “tap that butt” on your seat. Love it…lol.  Her mix of using weights along with pedaling as well as tying in some push-up movements on the handle bars was impressive. The energy level was high and even if you needed to pedal at your own pace, it was okay too. 


            Would I do it again? Yes, I plan on it. Was my butt sore, yes, but I’m used to soreness especially when I know that I will be taking my body into new fitness dimensions.  You don’t have to be a size 2 to attend a spinning class, so erase that from you mind. I plan on sharing it with my trainees and who knows, I see a “fitness field trip” one evening on the horizon.

Looking to check out a spinning class? Check out this article and by all means, prepare your butt for the ride!


Friday, April 25, 2014

New Year, New Behavior 2014 - Status Check

It's hard to believe that we are approaching the month of May. Phew! Time flies. In January, many of you set resolutions/goals/accomplishments for this year. Well, time for a "2014 NEW BEHAVIOR" Status Check!!! WOO HOO!!!

Personally, I like to plan things out in increments for the year, it's easier for me.  For example, if you had decided to lose 50 pounds by the end of this year, at this time, you should be pretty close to half way towards reaching your goal...right?


This is your status check time. Take a moment to assess your goals. Are you on track? Have you given up and bailed out? If you are victim to the challenges that life tends to bring, you still have some time left. Let's say you may have started with losing 50 pounds, how about changing it to 25 pounds instead? 

It's time! You don't have to forego things for another year. If you have fallen off your 2014 plan so far. Don't let your inner voice convince you that it's okay to wait another year. Not when you can still get something accomplished this year. Now, if you are on course, pat yourself on the back and keep it going. 

Whichever your situation, we are only approaching May and many things can be done from this point out.  Balance is key and whatever your goal is for this year, you can plan on celebrating your success come New Year's Eve!

Need help with getting there? Share what you plan on accomplishing by the end of the year. You will be amazed with yourself when you reach your goal. 


Wednesday, April 23, 2014

Pause...take a moment!

Life keeps us busy. We are continuously going, doing, planning, texting, talking, typing, reading, eating, blah, blah, blah.  Pause for a moment, no matter where you are. Inhale the beauty. Inhale life. Inhale the appreciation of being in the present time. 


Hotel rooftop in New Orleans

"Happiness is an inside job." ~William Arthur Ward

Friday, February 21, 2014

Chocolate Strawberry Smoothie

I love strawberries.  I love chocolate.  I love strawberries dipped in chocolate [pause...need a moment]. Together, they are such a beautiful and mouth savoring combination.  One one of my shopping trips to Sam's Club, I happened to have grabbed a bag of frozen strawberries. I figured, why not start making some strawberry smoothies. Simple, right? Nothing to it. I had some Silk Pure Almond Milk at home. I was all set. That's what I thought. Things changed as I went onto my next stop, the grocery store. I went to purchase my husband's choice of milk and then it hit me. I happened to glance over at the Silk Pure Dark Chocolate Almond Milk


Ah, YES!!! Of course! Why not blend the frozen strawberries, with the dark chocolate almond milk and have the joy of chocolate and strawberries!???!!! I couldn't wait to get home to create. 

What you need:
1 cup of Silk Dark Chocolate Pure Almond Milk
1 cup of frozen strawberries
1 banana (doesn't have to be frozen, but if you want, place the banana in the freezer the night before)

Press the smoothie setting on your blender or whatever appliance you make your smoothies with. Smooth it all together. Pour into a large cup and enjoy. Yields about 20 ounces. 


What seemed to be an innocent purchase has turned out to be part of a morning ritual sipping chocolate and strawberries in a cup.


Está tan bueno!


Wednesday, February 19, 2014

White Bean, Brussels Sprounts and Pomegrante Tart

Another fun recipe made it onto my list over the holiday season.  This one was found in the November 2013 issue of Vegetarian Times on page 42 or visit the site.  You have to be one that likes to think-out-the-box for this one. Surprisingly, I had no idea how much I would really enjoy this dish.  
  • This dish is so light and filling.  It is a combination of white bean purée which is spread on a crisp oven puff pastry crust and sprinkled with warm roasted Brussels sprouts and juicy fresh pomegranate seeds.


What you'll need:
  • 1 lb. Brussels sprouts, trimmed and thinly sliced
  • 3 Tbs. olive oil, divided
  • 1 15-oz. can white beans, rinsed and drained
  • 1 sheet puff pastry, thawed
  • ¼ cup fresh pomegranate seeds

Chop up the Brussels sprouts and toss with 1 Tbs. oil in large bowl. Season with salt and pepper. While the sprouts are cooking, purée beans in a food processor until smooth.


Roll puff pastry sheet into 12-inch square. Place over baking dish, trim and bake 15 minutes, or until golden.


Spread bean purée in hot pastry crust; top with roasted Brussels sprouts, and sprinkle with pomegranate seeds.


This dish was so good. On your next food adventure, be sure to put this one on your list. 

Vegetarian Times, November 2013 p.42

Tuesday, November 19, 2013

Hash Browns, Turkey Sausage and Egg Muffins

I love breakfast, who doesn't? Well, you should. It's a very important meal of each day. I came across this recipe and I just have to share.  Originally, it was in Clean Eating Magazine's November/December 2012 issue. I've made it with both the frozen shredded potatoes and the refrigerated shredded potatoes that are usually found near the cold juices and eggs in the grocery store.  I like both chicken sausage and turkey sausage. By all means, use what you like.  Just remember to keep things "healthy". 

Make these on one of your "cooking" days and just store them in the frig for grab-n-go mornings.

Enjoy!

Ingredients: 
  
1 1/2 lb shredded potatoes 
  
1/2 tsp sea salt 
  
1/2 tsp pepper 
  
Olive oil cooking spray 
  
3/4 cup grated low-fat Swiss cheese 
  
3 ozs. chicken (or turkey sausage), cooked and diced
  
3 chopped green onions 
  
3 large eggs 
  
3 large egg whites 

Directions:

Preheat oven to 400 F.

Spray muffin tins (12 ) with cooking spray.

Transfer the shredded potatoes to a colander and press firmly to get out all the excess water. You can skip this step if you're using the refrigerated version.  They tend not to have a great deal of moisture.

Transfer potatoes to a large bowl, and add 1/2 of the salt and pepper. Mix.

Add about 1/3 cup potatoes to each muffin cup. Press the potatoes into the base and up the sides of each muffin cup. Making a little nest.


Bake until the edges on the potatoes are golden brown. About 20 minutes. Reduce heat to 350 F.

Lightly mist the muffin tins around each potato muffin cups with cooking spray.


Divide the cheese among the potato “nests” followed by sausage and green onions.

In a bowl mix eggs, remaining salt and pepper. Pour into the nests, and spread the remaining cheese on top.


Bake for 12-15 minutes. Or until eggs and cheese are melted. Cool in a pan for 10 minutes before serving